
 Comments
 Posts
Posts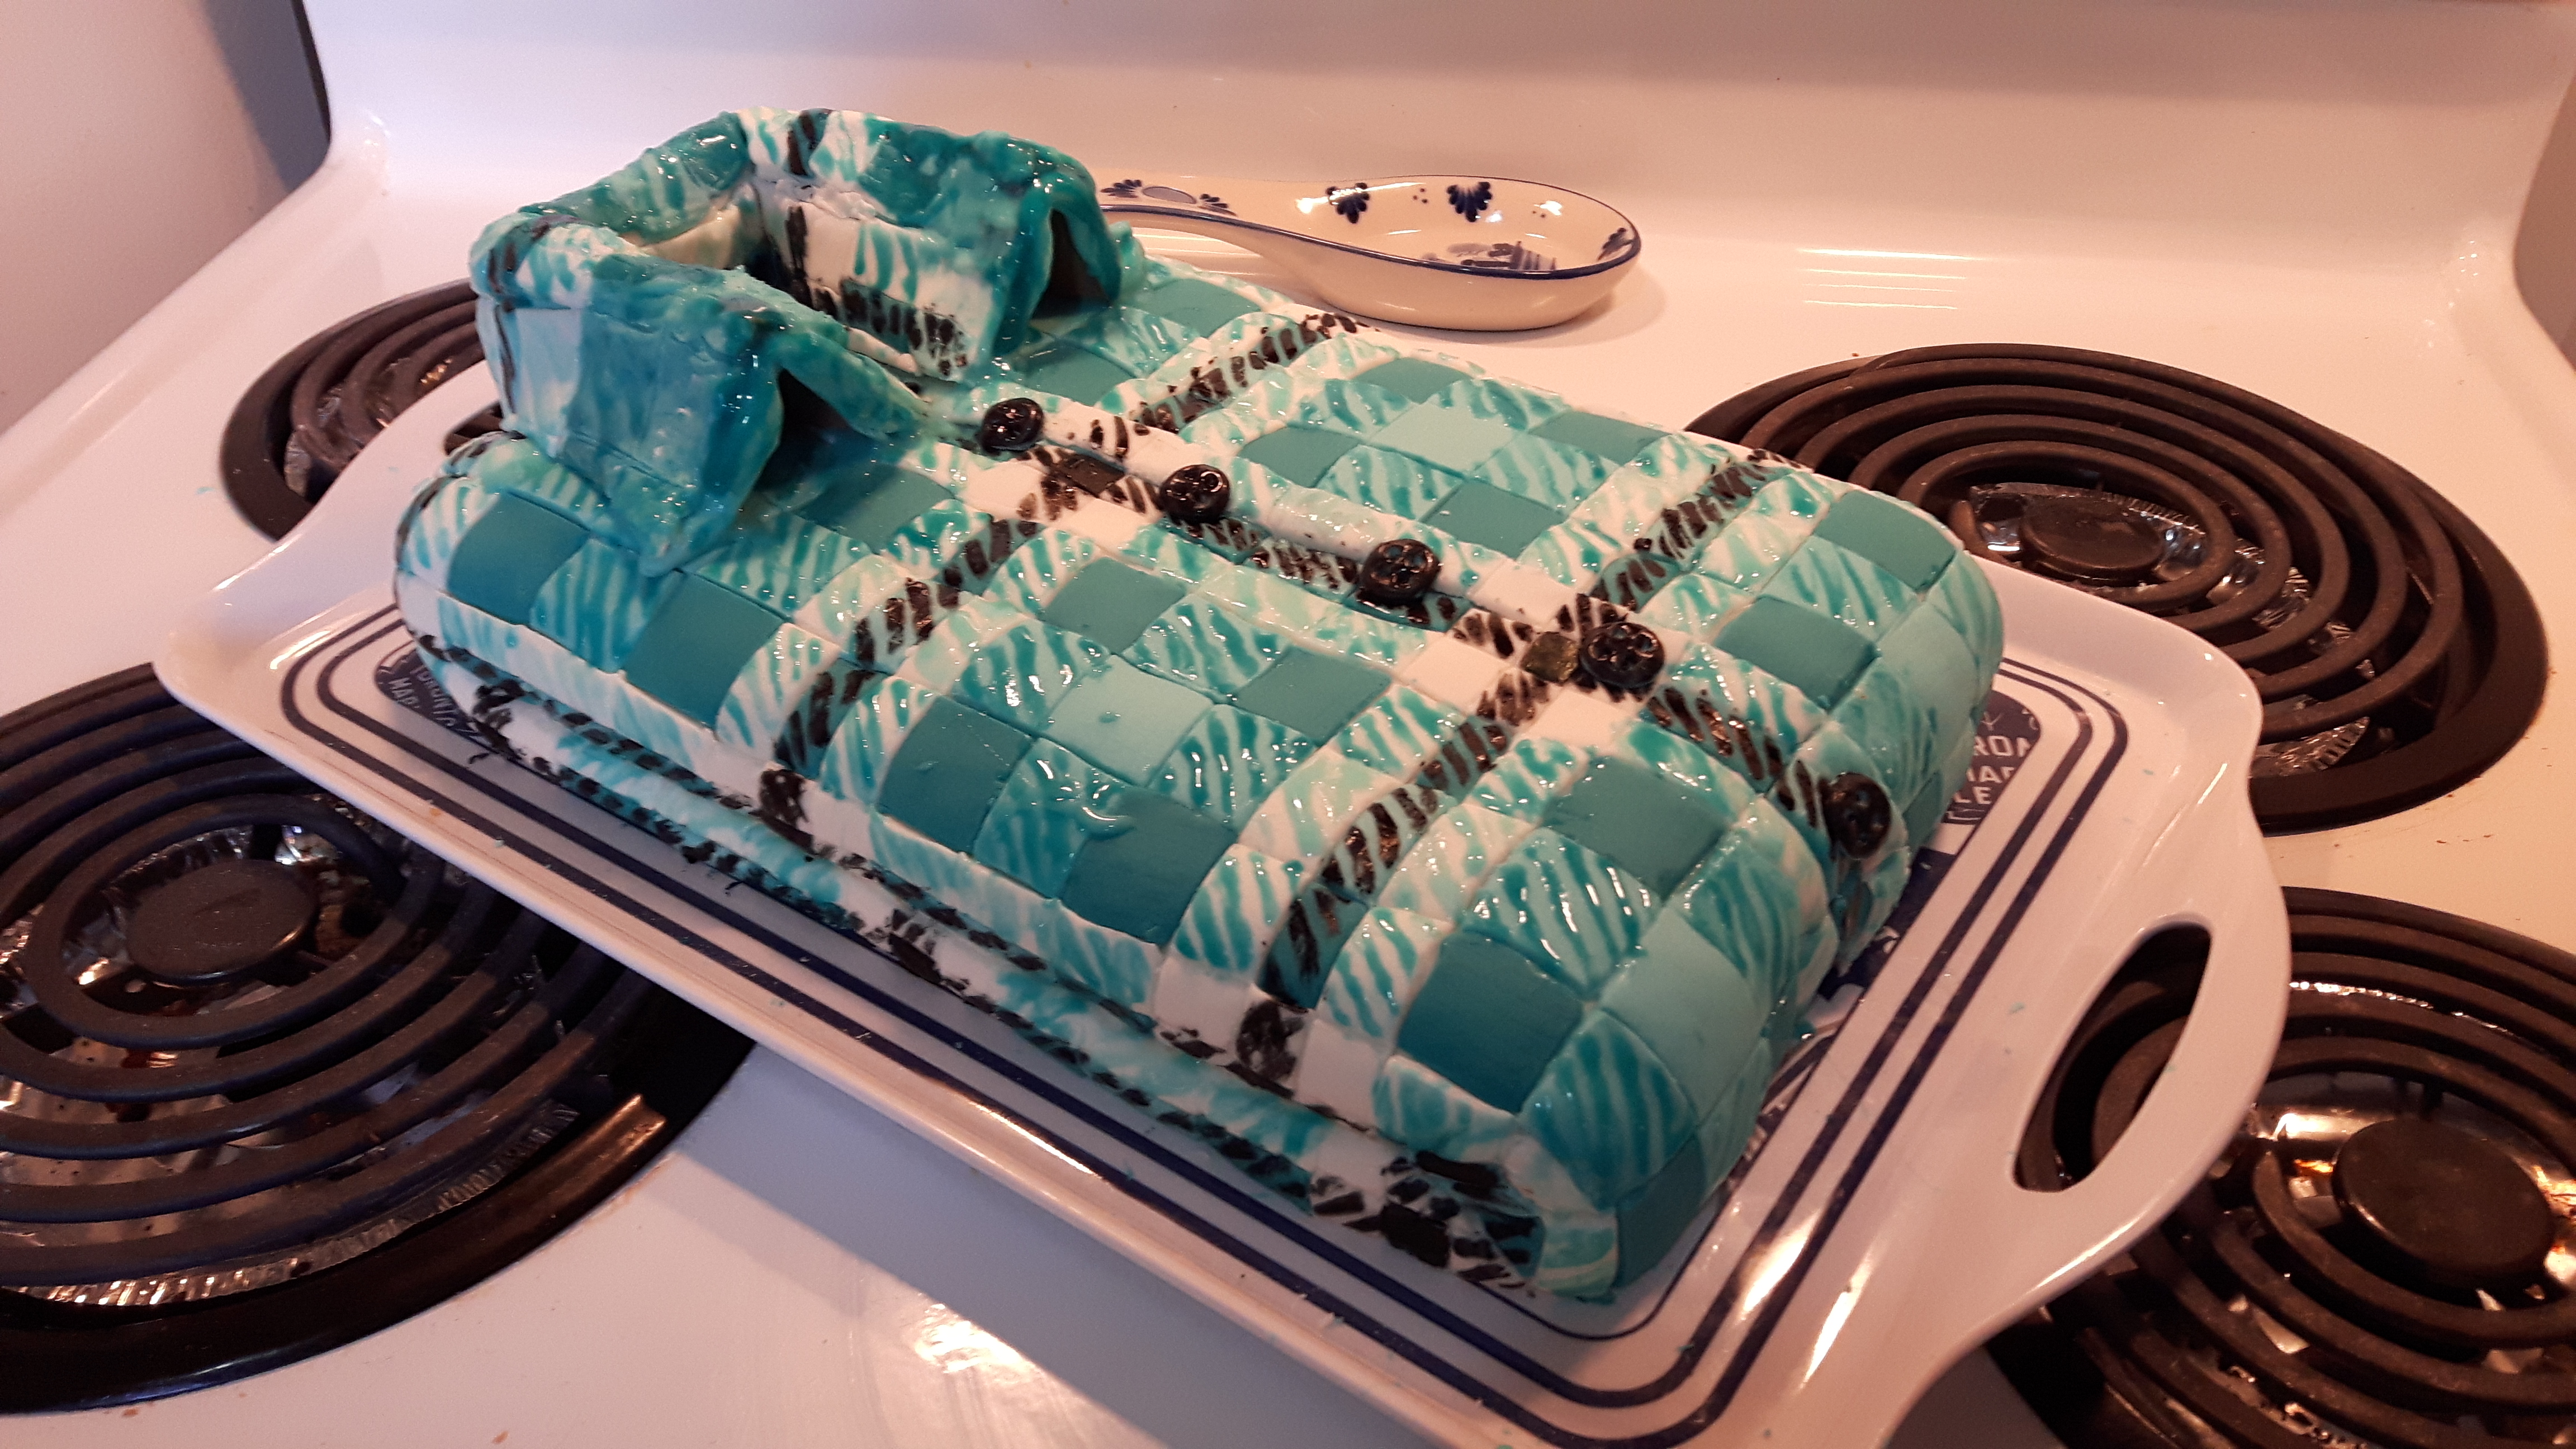
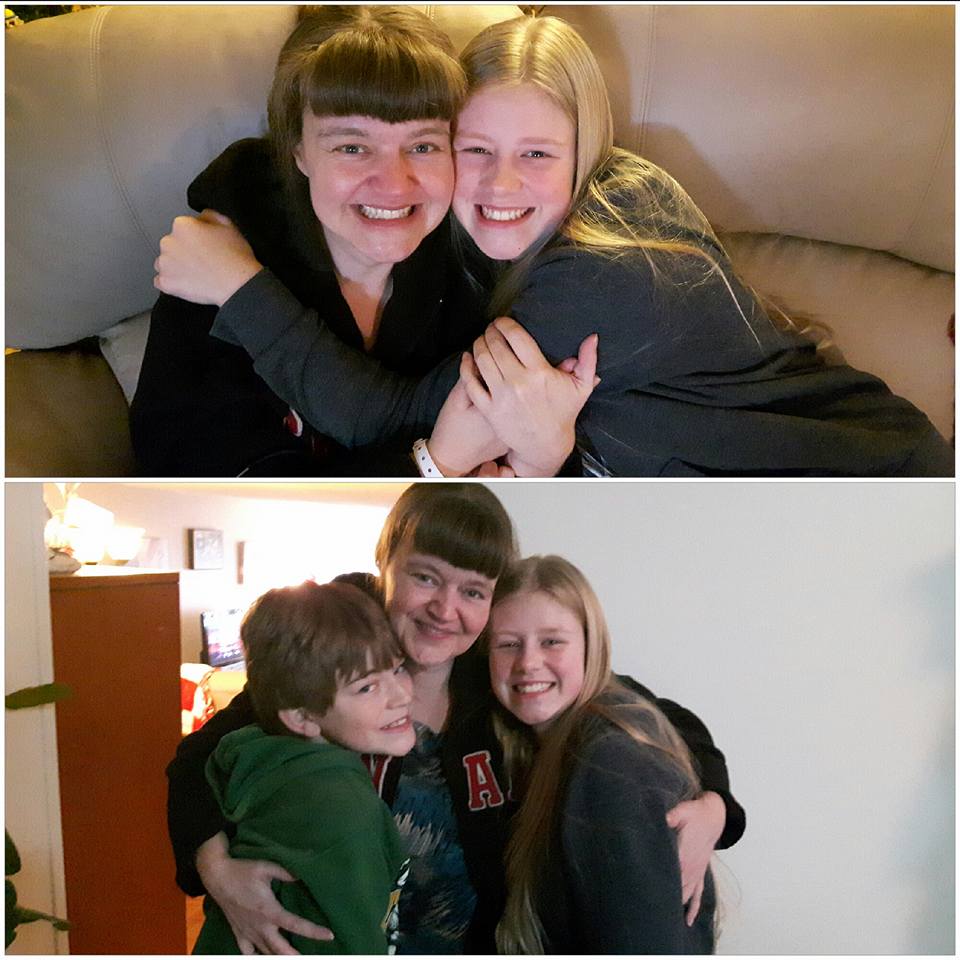
My daughter just turned 15 years old! WOW!
I can’t believe it! Where on Earth did the time fly?
Last year we didn’t get a chance to celebrate her 14th birthday because I had been in a 3 week long coma due to double pneumonia which progressed into ARDS (Acute Respiratory Distress Syndrome) and nearly didn’t make it.
Found out later that I had about a 20% chance of survival, so yeah, pretty lucky to still be here. But that’s a story for another day.
 One gift that we did get is that I was doing well enough with my recovery to come home on her birthday as a surprise, which is now one of my favourite memories ever!
But I wasn’t strong enough yet to bake her a cake to celebrate her special day. Instead my fiance made her an ice cream cake so she could at least make a wish and blow out the candles.
So this year, I wanted to make sure her special day was really special!
Her birthday is always during March Break, which means that she is home with me during the day. So this year we spent the days prior and even on her actual birthday working hard together on a special cake to celebrate her special day. 😀
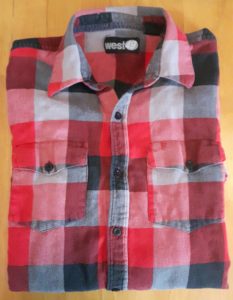
Xanthe LOVES plaid anything!
And she LOVES wearing plaid shirts the most! AND blue is her favourite colour, so…..
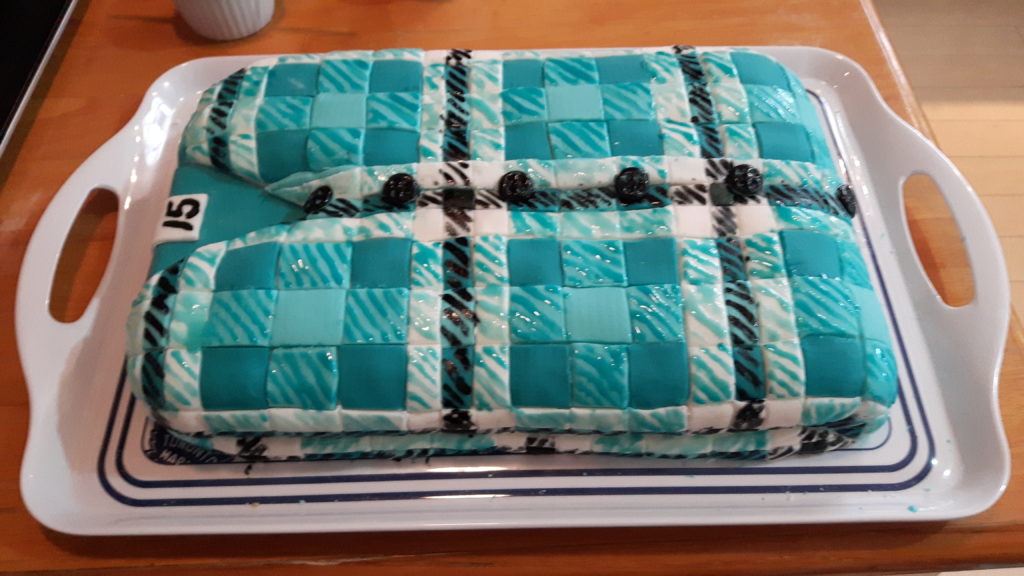
 We decided to make a “Blue Plaid Folder Shirt Cake”!
Here’s one of her all time favourite shirts that she loves to wear, we used it as our model.
Let me tell you, that is NOT a small job!
I’m still not 100% recovered yet, and get tired very easily. There is no way I’m well enough yet to make a cake like this on my own, it would literally take me weeks to get finished if I’d had to do it all on my own.
But Xanthe wanted to be a part of the cake making and decorating process this year. She is a very talented and loving girl. She ended up doing almost 100% of the baking, and at least 50% of the decorating. It was so much fun working together in the kitchen for those wonderful days leading up to her birthday.
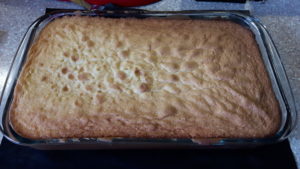
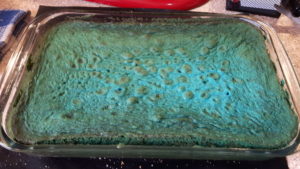
We wanted to make the inside as fun as the out so we decided to bake two vanilla cakes and dye one of them blue, more like a teal blue to match the teal coloured fondant.
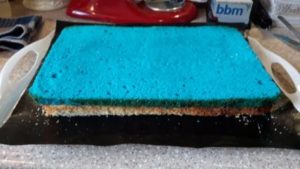
We then leveled both cakes, removing the caramelization, layered them one on top of the other with yummy mocha icing in-between the layers and then simple syrup-ed them to keep them moist while we decorated them.
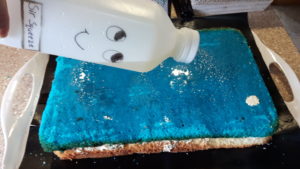
We forgot to simple syrup them before layering so we simply syrup-ed them on one side, then flipped the stack and syrup-ed the other side. Easy peazy! 😀
Simple syrup is just equal parts water and sugar brought to a quick boil, just to let the sugar completely dissolve but not allowing it to go into a candy state. Once it’s completely cooled you can drizzle it over your cakes to keep them moist while you decorate. It also adds extra yumminess to your cakes! 😀
You can get the Simple Syrup Bottle, just like Yolanda Gampp’s Sir Squeeze (-a-Lot!) here on Amazon, as well as on her How To Cake It channel website.
 Xanthe and I had so much fun working together on this. One of the most fun parts about being a mom is watching your children learn and grow and experience joy when they learn a new talent.
Xanthe was a natural! She took over every aspect of the baking and crumb-coating to get our cake ready for the fun decorating part about to come.
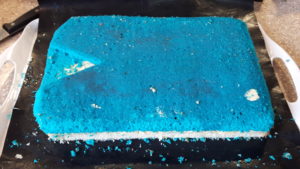
We put the two stacked cakes with the icing layer in-between in the fridge to let harden for about 10 minutes before carving the cake into the shirt shape and then crumb-coating the whole thing. (Trust me carving a room temperature cake with icing in it can be a VERY messy task indeed!) 😉
After the cake and icing had had time to harden I had fun carving away the rounded corners of the cake to make it more like a softly folded shirt and also of course carving away an area for the inside of the neck of the shirt that the collar would go around.
Then Xanthe crumb-coated the whole cake and we let that cool in the fridge again before adding the final layer and then finally starting our work with the fondant decorating.
A crumb-coat is just a thin layer of icing that you put on your cake to help stick all the loose cake crumbs to the cake so that your next round of icing will be crumb-free!
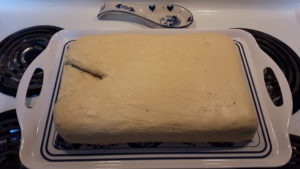
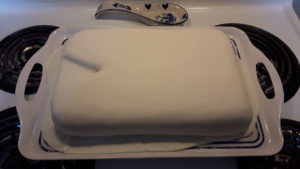
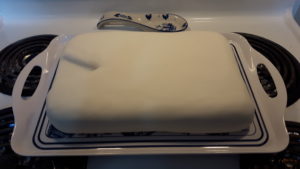
After the second coating of icing had set in the fridge, we rolled out some white fondant and using a rolling pin draped it over the cake and quickly smoothed down the corners before the fondant would want to rip. If you’re not quick, it can tear with the weight of it.
Then we smoothed down the neck and pushed in the sides before trimming it away from the cake with a sharp paring knife.
Fondant Tip: If you find that your fondant has air bubbles forming under it, just push the air all to one spot on the cake and use a clean new sewing pin to stab a tiny hole in the fondant and gently encourage the air out with your hands.
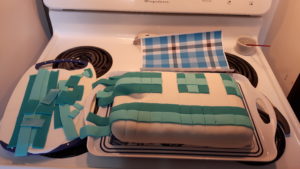

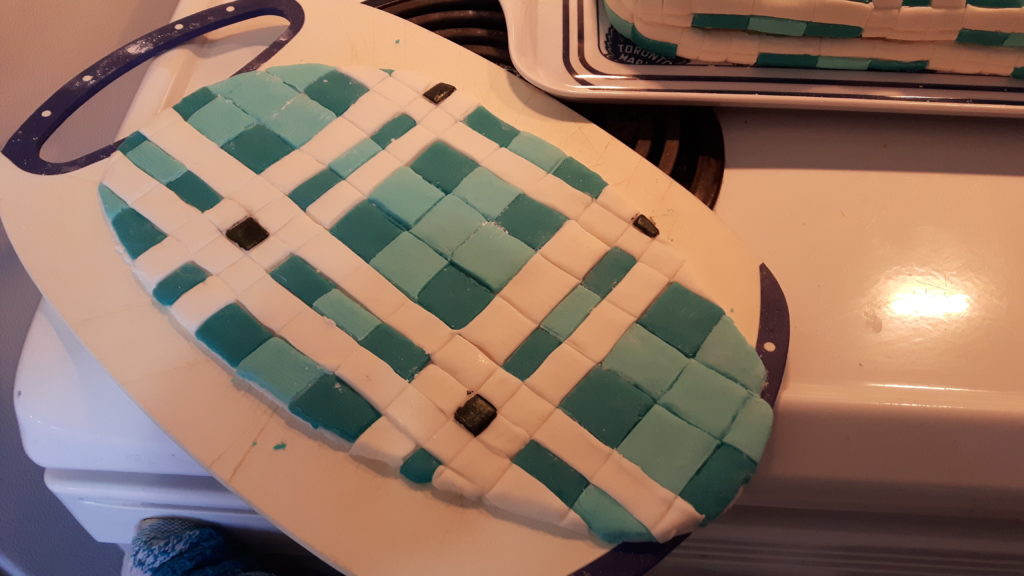
We printed off a “plaid” template that we found online and used that to figure out the patterns and amount of colours that we would need to do a more traditional plaid pattern.
Plaid has a LOT of parts to it!
 This is where Xanthe really was a HUGE help!
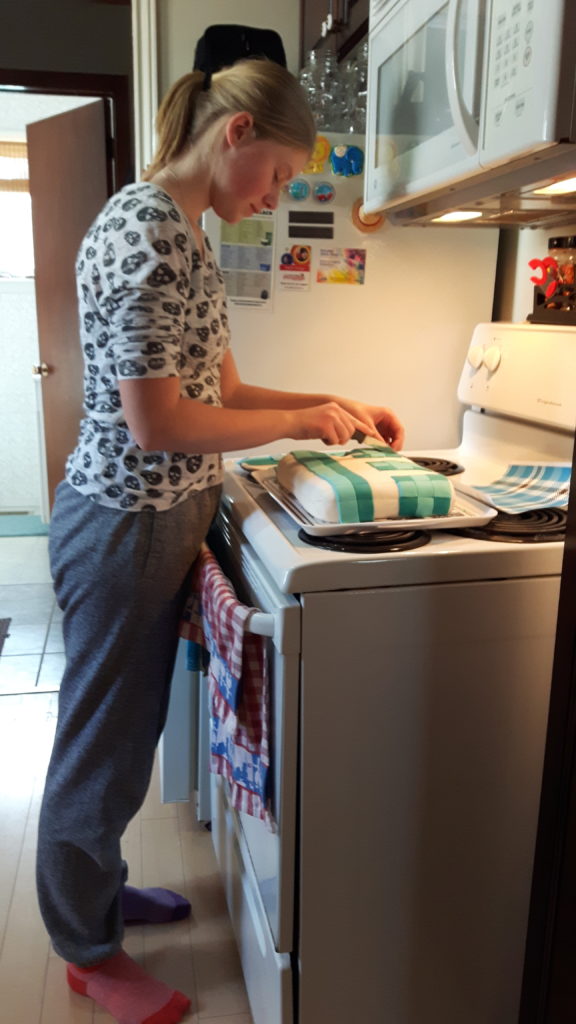
Standing for long periods is one of the toughest things for a lung patient. Xanthe therefore made sure to make me sit while she placed most of the pattern pieces on.
We had bought a dark blue/teal fondant and a while fondant. We created a lighter blue by simply kneading together some of the blue and white fondant together.
As well as creating the plaid pattern on the shirt, we also created a second one on a separate piece of rolled out white fondant that we then formed into the collar later on.
Which was definitely NOT an easy task!
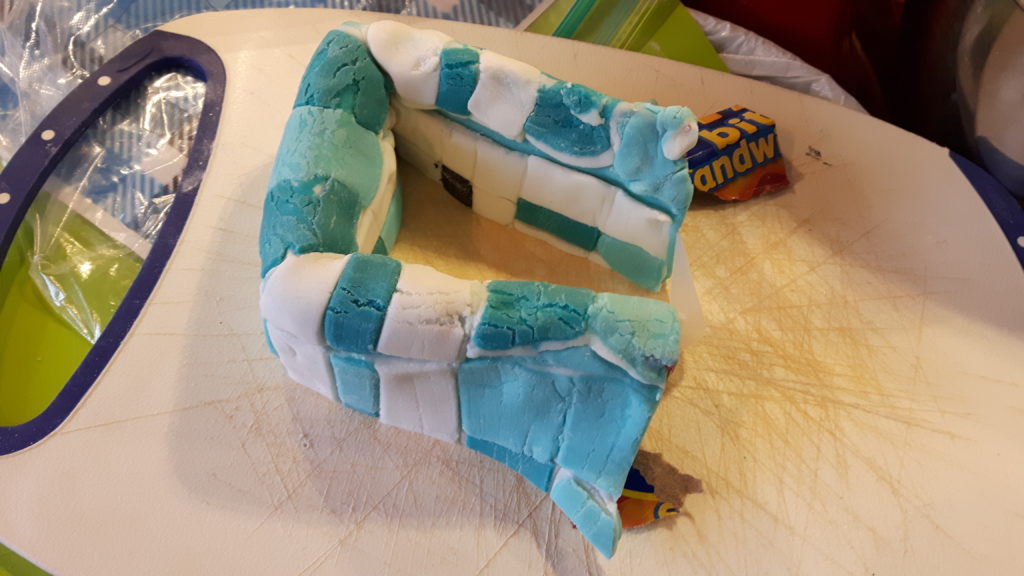
When you work with fondant its always best to work quickly because as it sits, it gets dry and then wants to crack and break when you move it!
Which is exactly what happened! BOO! :'(
To try to avoid that from happening, I warmed it up in the microwave for about 20 seconds but it still ended up cracking so I had to make a paste from the fondant to fill in the cracks. So not my best work, but oh well, Xanthe still loved it! 😀
I used a piece of cardboard to create the mould that I placed the collar over and let that sit to dry and harden to put on the cake later.
If I were to do it again, next time I would keep the separate piece in a plastic ziplock bag to keep it from drying out. I think that would do the trick nicely. Wasn’t thinking. Was on a bit of a deadline to get it done and just wasn’t thinking clearly, but learned from it! YEAH!
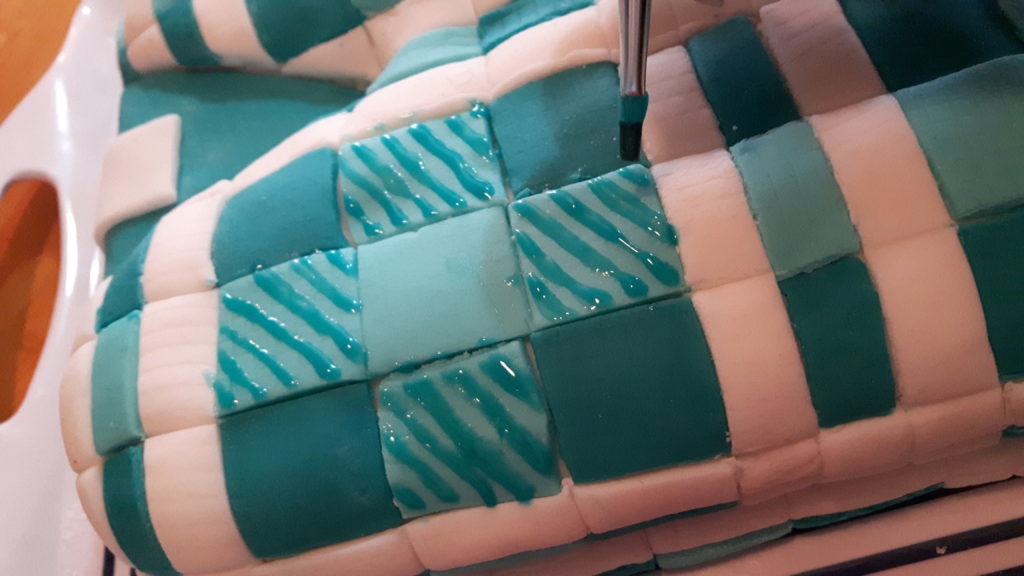
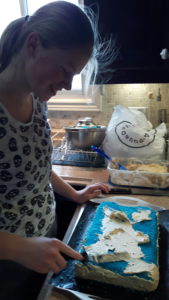
To make the rest of the colours of the plaid, we had to paint those on by hand in a “striped” fashion.
Have you ever took a close look at how plaid is made up? It’s pretty complicated when you go to replicate that on a cake with fondant! 😉
When one colour overlaps another, it does so in a striped fashion. So that meant I needed to paint on stripes the same colour as the one that was “crossing” it.
I could not find food colour that matched our colours exactly so instead what I did was I watered down some of the coloured fondant (the dark blue/teal and the lighter version) and then proceeded to quite literally paint on the strips.
The painting wasn’t easy but wasn’t the hardest part either…the figuring out where to paint what was the hard part!
I admit, I thought the cutting and placing of all the different pieces of fondant were time-consuming…nope, the painting was the most time-consuming for sure! The fondant paint kept wanting to dry out and I would have to re-wet it again and again over and over again!
I used black food colour to paint on the black parts, so that was the easiest part to do.
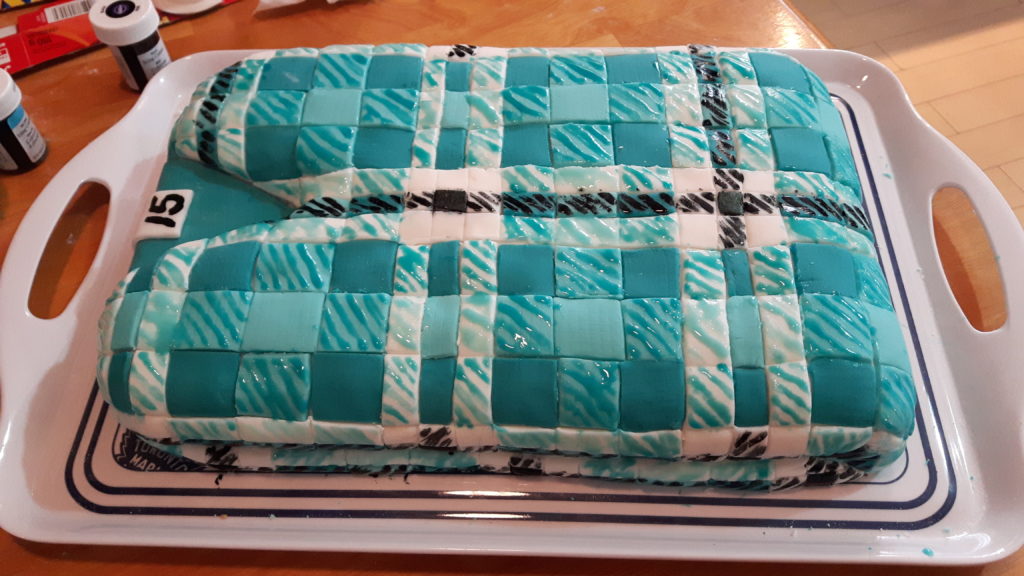
I made a “tag” for inside the neck where I wrote on Xanthe’s new age “15” and made some buttons for the shirt out of the left-over blue fondant and painted them black.
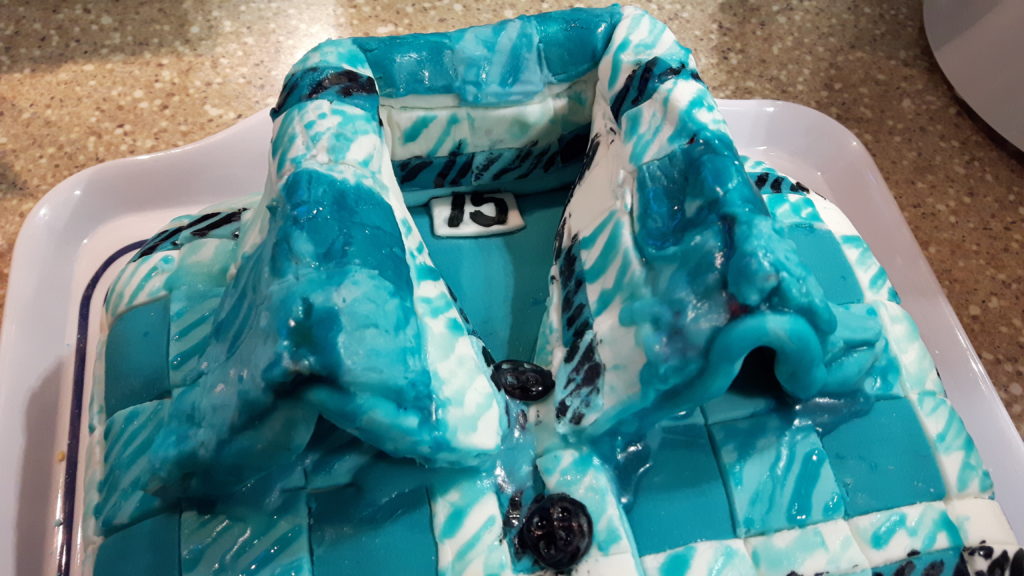
Then it was time to place the collar on the cake. I had originally wanted to take the collar off of the cardboard mould and have it hard enough to just sit on the cake as is but it turned out to be way too heavy and so I had to keep the cardboard underneath the collar to help support it.
But I needed even more support…and I hadn’t made the collar long enough to hide the cardboard and couldn’t cut away some of the cardboard because the fondant just kept on wanting to rip.
Fondant Tip: If you want to place a 3 dimensional fondant object on your cake then you need to give it a few days to completely harden or it will want to sag!
Because of that, I had to end up filling the edges with leftover fondant to hide the cardboard, as well as an extra piece placed under the back of the collar to give it more support since it kept wanting to slide down the back!
So definitely NOT the prettiest part of the cake…but a great learning opportunity for the next time!
That’s one of the best parts about making cakes for family and friends, the ones who don’t pay, they are your “practice” cakes! The ones you get to learn from and improve your technique on! 😀
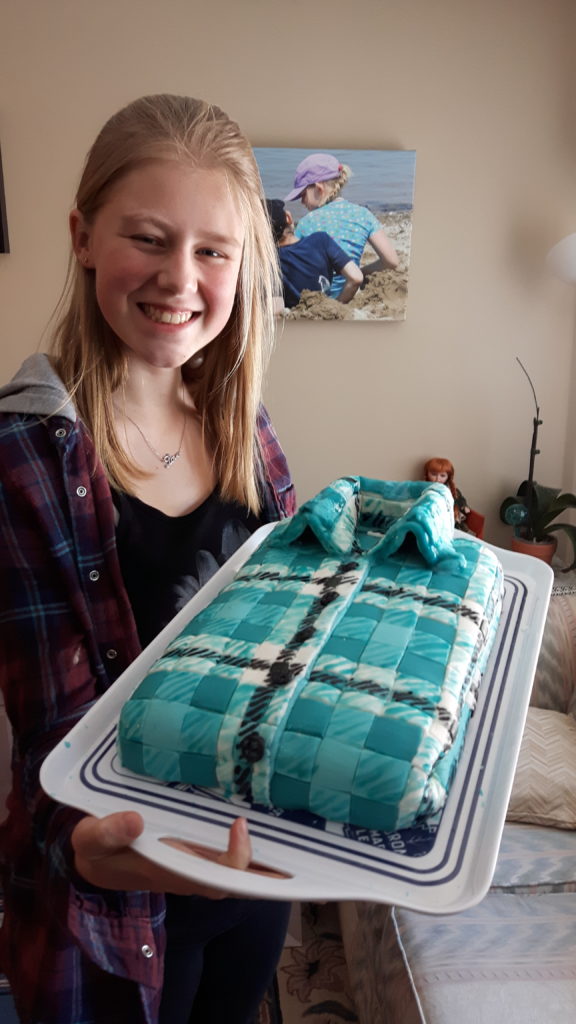 Xanthe was so happy with the final result and that’s all that mattered to me! 😀
We posted some pics of the cake on our Facebook page and our friends wrote us comments like:
“Gotta tell ya, when I first looked at the pic, I thought it was a real shirt!! Great job yall🖒🖒🖒!”
“Wow! That, my dear, is fine Art! You are AMAZING! XOXOXO”
“That’s a WOW cake!”
“What a great cake!! Bet it tastes as good as it looks!”
Xanthe was so excited at all the lovely comments that she got for making an amazing cake with me! 😀
It was a few days of special memory-making. For that I will always be truly grateful!
Please leave Xanthe a comment below and let her know how you liked the cake I helped her make. Thank-you so much. <3 :*
Cheers…Amanda van der Gulik…Excited Life Enthusiast! ;o)
P.S. If you enjoyed this post, then please share it with your friends and family. Thank-you.
P.P.S. And make sure you leave us a comment below and if you’ve ever made a “shirt” cake let me know, I’d be happy to add your one to this post for you with a link to your own site if you would like! 😀
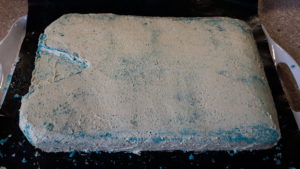
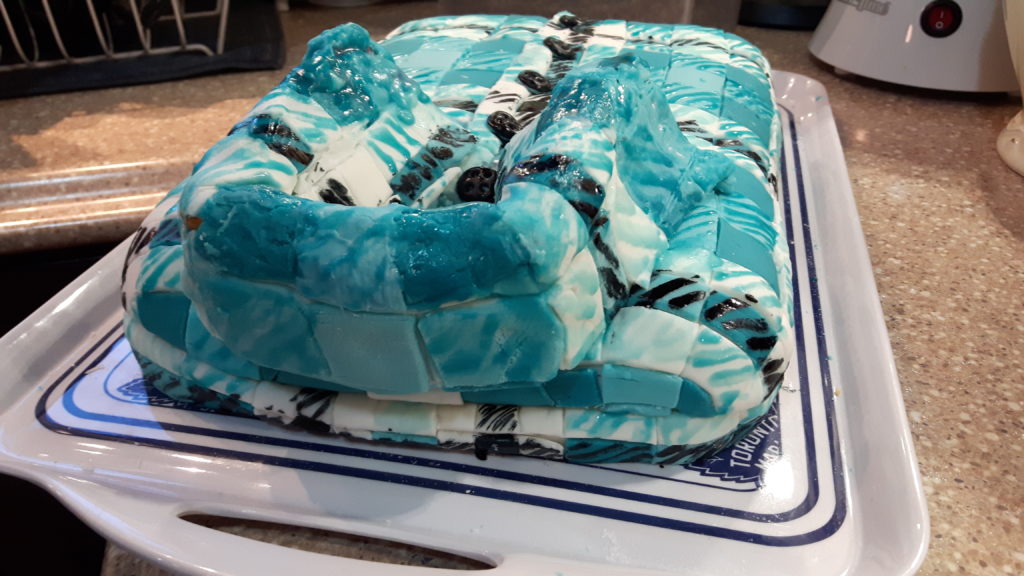
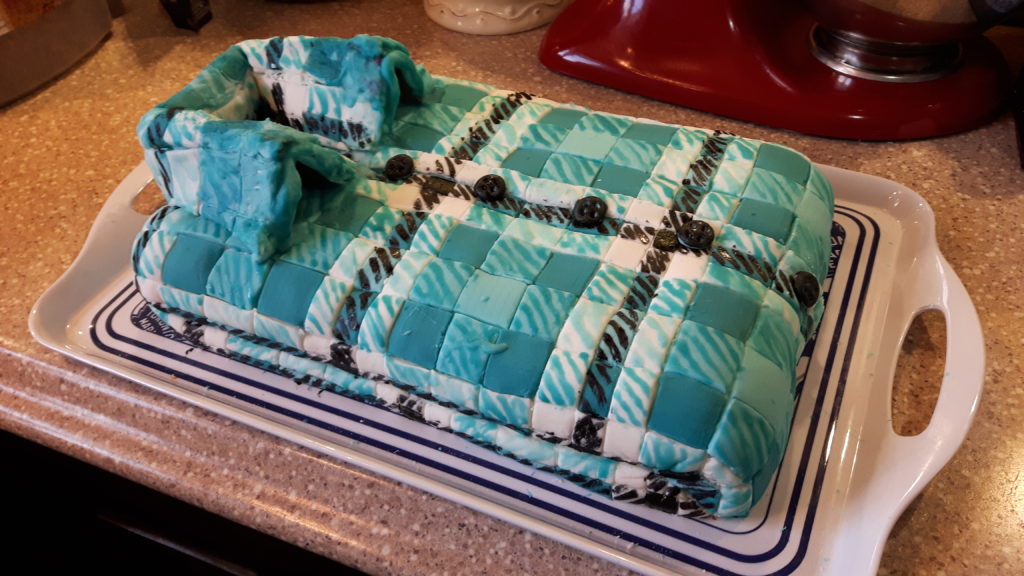
This is what the final cake looked like after the painting had a chance to completely dry.

3 Responses to How To Make A Plaid Folded Shirt Cake With Fondant Colar ~ For A Special Birthday! 👔🍰👕🍰👚 … And New Happier Memories!